A Study of Modular UI Design: Icons
Background
There are already many high-quality icon libraries, such as Untitled, Lucide, and Remix. For more comprehensive options, you can also refer to React Icons and Iconfont.
Although there are so many existing icon libraries, if all you can do is choose icons based on their meanings… even someone who is not a designer can do that.
We cannot “know what something is but not know why it is so.” So let’s start with icons and understand the theory behind design.
Overview
In the field of UI design, icons play a central role. They transform textual information into visual symbols, simplify users’ understanding of content, and enhance the aesthetics of the interface. Especially in B-end design, although icons are not used as frequently or as complexly as in C-end design, in form-oriented page layouts, appropriate and suitable icon design can highlight the style and brand tone of a product or even the entire enterprise.
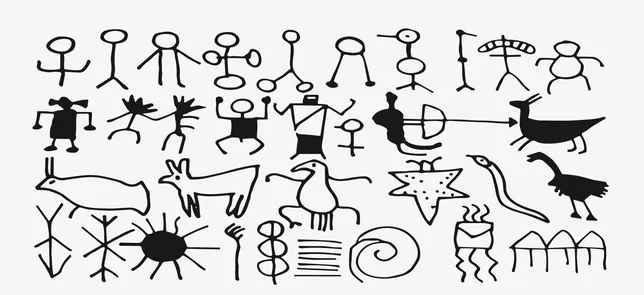
The earliest form of visual communication was basically carried out through graphics. This is a prehistoric cave mural by North American Indians. Although murals are often said to be the predecessor of writing, I personally feel they are also very similar to icons. Icons are more like a universal language, crossing various languages such as Simplified Chinese, English, and Korean.
The Ins and Outs of Icons
First of all, an icon should clearly represent an object, operation, or idea. If users cannot see/understand its meaning, the icon becomes a flashy but impractical decoration, and may even hinder task completion.
Icon Size
In fact, when using various component libraries, I discovered that the icons in these libraries are all based on a 24px size.
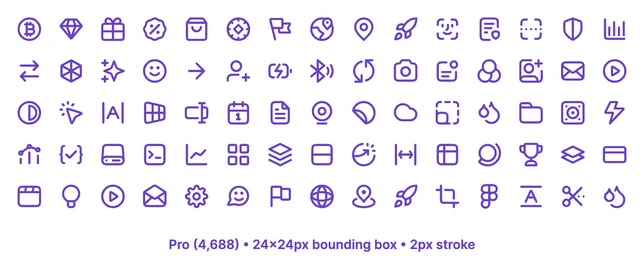
After searching through online materials, I found several possible reasons:
- The 24px size ensures that icons remain clear and readable across various screen resolutions and devices.
- The 24px size adapts to multiple grid systems (such as the 8-Point Grid System), making it easier for designers and developers to collaborate.
- 24dp*24dp @x1 is the “perfect size” for icons recommended by the Material Design 3 specification. At the same time, Material Design recommends a minimum touch target area of 48dp.
I have not yet found supporting data behind this, so I will apply it based on convention:
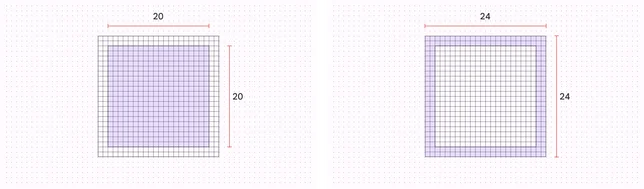
- The recommended standard icon size is 24px*24px, usually with 2px of padding around it, but this is not absolute; the specific margin should be judged based on the Keyline. The corresponding recommended touch target size is 48px*48px.
- In desktop environments, the icon size can be adjusted to 20px*20px, with a recommended corresponding touch target area of 40px*40px.
- 16px is usually used as the minimum size. At this size, icons should be designed to be more concise, and their decorative role will be greater than their functional role.
“Rules are rigid, but people are flexible.” We can apply this guideline while also taking actual circumstances into account.
px, dp, and pt are not equal; they each have their own conversion relationships. You can search online for specific information.
Icon Styles
Existing icon styles are varied and complex, and have long since gone beyond just linear and filled styles. Icons on the C-end are even more diverse. Here, we will temporarily analyze them based on basic styles.
Below are the icon styles of Untitled Icons that I found: Line, Duocolor, Duotone, and Solid.
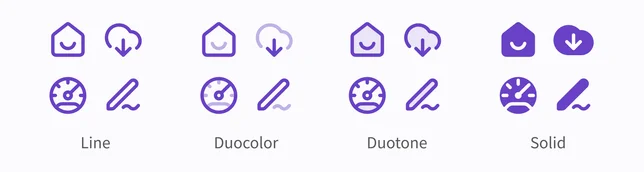
The four icon styles above can basically meet all the needs of B-end design.
If divided in a more detailed way, Material Design further divides “linear icons” into: OutLine, Rounded, and Sharp.
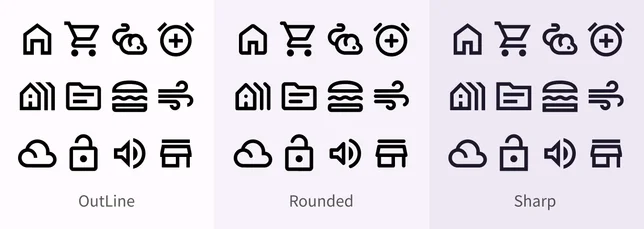
Combined with the stroke thickness and radius size of linear icons, this is basically enough to meet the customization needs for a company’s and product’s character.
In addition, the style of an icon not only affects the overall interface style, but also affects the functionality and user experience of the icon:
- Complex icons are not suitable for overly small sizes (16px * 16px icons need a more concise linear style)
- Filled icons are generally easier to recognize than linear icons, but the specifics need to be judged based on the icon shape source of conclusion
Icon Design
First of all, I want to say that I have never completely independently designed an icon. In the past, if there was no icon that met the requirements, I would basically take an icon with a similar meaning and then simply adjust its shape.
So, taking this opportunity, I can also get some exposure to icon design. Ant Design’s icon design guidelines have actually already covered a lot of related content, and I recommend learning about them first.
Using Keyline
Keyline is the foundation of the grid. By using these core shapes as guides, we can maintain consistent visual proportions among system icons.
The image below is a Keyline grid drawn according to the specifications of the Material Design 3 Icon design template. Based on this grid, you can basically draw all kinds of icons.
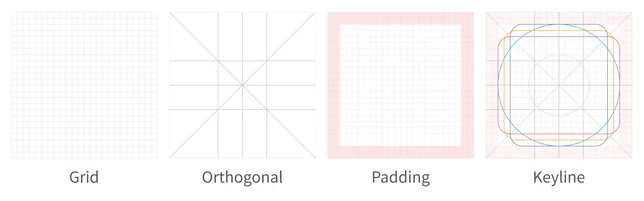
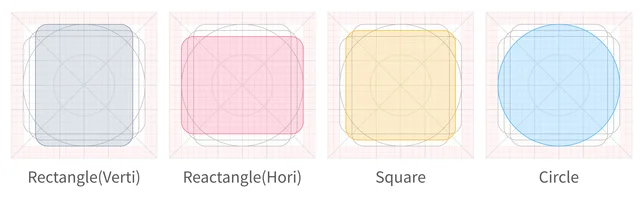
In today’s world where design resources are everywhere, you can absolutely find icons on iconfont whose style meets your needs. Then, based on the product’s style, simply redraw them. There are very few cases where a designer truly needs to create something completely from scratch.
I also tried applying Keyline to draw several basic icons: home, card, lock, and file. These are also the four basic shapes on the Keyline.

During my own hands-on practice, I discovered a few small tips for icon design:
- Try to use Boolean operations with “basic shapes” to construct icons.
- Keyline provides numerical balance, but numerical equality does not equal visual balance (for example: a play icon).
- When choosing a stroke alignment method, icon design mostly uses center alignment (Center) or inside alignment (Inside). Center-aligned icons will look larger under the same conditions.
- In Figma, using
Shift + Backspaceto delete points and making use of the pen tool’s center point feature can greatly improve the efficiency of icon design. - After icon design is complete, you can apply Flatten to integrate the icon lines together, making unified processing easier. There is no need to turn strokes into fills, because this is not conducive to later adjustment of line thickness.
Icon Application
After icon design is complete, the next step is to consider how to effectively present these icons to the audience. As the saying goes, “even an ugly daughter-in-law eventually has to meet her parents-in-law,” which means that no matter what the design result is, there needs to be a process of presentation and feedback. This is not only to showcase the results, but also to obtain feedback, improve, and optimize the design.
Image Method
The most traditional display method is naturally images. Designers export icons in @1x and @2x according to states such as default, hover, pressed, active, and disabled, package them into a compressed file, and send it to the front-end developer. Or the designer exports the images and uploads them to Lanhu, and the front-end developer downloads the icons they need from “Lanhu” by themselves.
If the front end needs icons in image format, I usually compress the icons through TinyPNG to make the icons occupy as little space as possible while ensuring their clarity. My most commonly used tool is TinyPNG4Mac, which is quite convenient. Some front-end scaffolding tools also come with image compression features, and images occupying less than a certain value will also be converted into Base64 encoding for storage.

Tracing back to earlier technologies, we encounter “sprites,” which is a practice of integrating multiple icons into a single image with a transparent background. Designers place all icons on one image, and then the front end displays them on the web page based on each icon’s position and size. The advantage of this method is that it reduces the number of web requests. In fact, some websites today, when creating dynamic images, also often use a method similar to “sprites,” creating animation effects through continuous static frames.
Images in JPG / PNG format are the safest display method. All browsers support them. Although they are bitmap formats and are not clear enough after being enlarged, image formats can basically solve most website needs, and the solutions are mature enough.
Existing CDN service providers and/or some frameworks, such as Next.js, can intelligently identify whether a browser supports WEBP or AVIF formats. These two image formats can provide higher compression rates while maintaining higher clarity.
Font Method
As mentioned earlier, icons need to be exported by designers separately according to various states and then provided to developers. If the overall color scheme of the official website is adjusted, and all icons need to be re-exported, this might be a disaster.
Perhaps because of this or other reasons, the icon font solution appeared. The most commonly used icon font platform in China is iconfont. This requires designers to outline the icons and then upload them to iconfont. The front end can then reference icons by icon name and conveniently adjust their color and size.
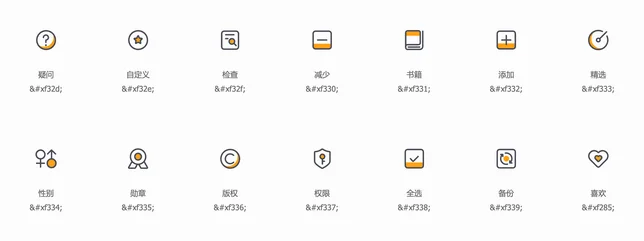
Until the time I wrote this article, font icons were still quite widely used. They are convenient to call and take up less space. However, the following main shortcomings affect the use of font icons:
- Icons need to be processed one by one by designers. For some icons, outlining alone is not enough; you also need to use the Figma Fill Rule Editor plugin to adjust the icon fill mode to “Non-zero rule” so that it can display normally in iconfont. For the specific solution, you can refer to
- If an icon disappears when adjusting the fill style through Fill Rule Editor, you can try copying the icon as-is into illustrator / Sketch, and then copying it back to solve the problem. (kidding)
- Font icons do not support multicolor icons well enough, and the degree of customization is not high enough.
- Font icons may also fail to render properly and require special handling (I once naively thought it was a problem with my browser).
I can only evaluate font-style icons from a designer’s perspective, because I have never used this method during development. Recommended article: Icon Fonts vs SVG Icons: What Works Best for You?, which compares the pros and cons of fonts and SVG in relatively great detail.
SVG Method
SVG icons not only inherit the main advantages of font icons, but also solve some limitations of font icons. Their main advantages include:
- Support for each icon having multiple colors, including gradients.
- Support for more complex graphics and shapes, without being limited to the basic shapes of fonts.
- Support for direct embedding in HTML code, making it convenient to edit and control icons.
- Support for CSS and JavaScript animations
iconfont also does not only support the font icon method. The official platform also supported referencing SVG icons through the symbol method several years ago.
We can briefly understand SVG through an example. The following is a “home” icon in SVG format exported from Figma, and its code is as follows:
<svg
  width="24"
  height="24"
  viewBox="0 0 24 24"
  fill="none"
  xmlns="http://www.w3.org/2000/svg"
>
  <path
    d="M15 21V13C15 12.4477 14.5523 12 14 12H10C9.44772 12 9 12.4477 9 13V21M15 21H20C20.5523 21 21 20.5523 21 20V9.48908C21 9.18049 20.8575 8.88919 20.6139 8.69973L12.6139 2.47751C12.2528 2.19665 11.7472 2.19665 11.3861 2.47751L3.38606 8.69973C3.14247 8.88919 3 9.18049 3 9.48908V20C3 20.5523 3.44772 21 4 21H9M15 21H9"
    stroke="black"
    stroke-width="2"
  />
</svg>
This SVG contains several key attributes:
- path: The path element defines the outline of the graphic, describing points on the path through a series of commands and parameters to form the graphic. In this example, these commands and parameters together form the shape of a house.
- fill: The fill attribute is used to set the internal color of the graphic. It can be a hexadecimal color code (for example, #FF0000), or a common color name (for example,
black). none means there is no fill, while currentColor uses the value of the color attribute of the element or its parent element. - stroke: The stroke attribute is used to define the color of the graphic outline, and it is used in a way similar to fill.
- stroke-width: The stroke-width attribute specifies the width of the stroke.
If an SVG contains multiple paths, there will be multiple path elements. Each path can have independent fill and stroke attributes to control its own fill and stroke styles. If a certain part of the graphic does not need a stroke, its stroke attribute can be set to none.
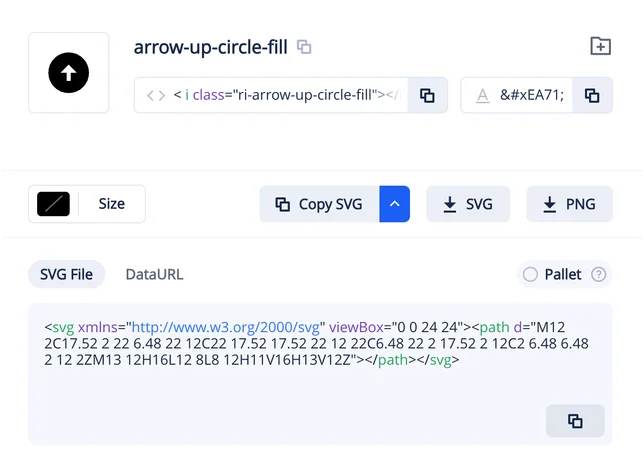
As shown in the image above, what we see is a preview of an icon and its corresponding code. If you look closely, you will notice that the code does not specify the icon’s width, height, fill color, or stroke color.
This approach is intended to provide SVG icon code that is as concise as possible, containing only core information such as the icon paths. The purpose of this design is to allow frontend developers to control the color and size of icons more flexibly. For example, if the SVG icon code includes a fill attribute by default, frontend developers may find that they cannot change its color when applying these icons. To solve this problem, one approach is to remove the fill attribute or set fill to currentColor, and then define the color through CSS. Another approach is to specify the desired color directly in the fill attribute.
It is not recommended to use hacky methods such as filters to adjust colors, because this approach can be both complex and imprecise.
Similarly, SVG icons support compression, and tools such as SVGO can be used to clean up redundant parts of the SVG code.
For frontend practices when using SVGs, you can refer to the examples below, which use Tailwindcss and Lucide Icons:
Direct Usage Example
This code example demonstrates how to use simple classes to control an icon’s size, color, and display effect in dark mode. The operation is very intuitive and convenient:
<div className="Container">
  <svg
    className="h-5 w-5 stroke-blue-500 hover:stroke-blue-600 dark:stroke-blue-400 dark:hover:stroke-blue-500"
    viewBox="0 0 24 24"
    xmlns="http://www.w3.org/2000/svg"
  >
    <path d="M15 21V13C15 12.4477 14.5523 12 14 12H10C9.44772 12 9 12.4477 9 13V21M15 21H20C20.5523 21 21 20.5523 21 20V9.48908C21 9.18049 20.8575 8.88919 20.6139 8.69973L12.6139 2.47751C12.2528 2.19665 11.7472 2.19665 11.3861 2.47751L3.38606 8.69973C3.14247 8.88919 3 9.18049 3 9.48908V20C3 20.5523 3.44772 21 4 21H9M15 21H9" />
  </svg>
</div>
Package Usage Example
The following example shows how to apply icons through a package. This method is also simple: you only need to import the required icons and set the styles:
import { Home } from 'lucide-react';

const App = () => {
  return (
    <Home className="h-5 w-5 stroke-blue-500 hover:stroke-blue-600 dark:stroke-blue-400 dark:hover:stroke-blue-500" />
  );
};

export default App;
To deliver design icons to the development team, you can choose iconfont or use the figma-icon-automation plugin to package the icons as an npm library, making it convenient for the development team to use them via an installed package. This method only needs to be configured once and is highly efficient.
Although the way SVG icons are used involves code, this section is still written for designers. The purpose is simply to tell everyone that SVGs do not have issues with being difficult to adjust in color, nor are they difficult to use. Actively encourage developers to follow up~
Conclusion
Behind this tiny icon lies rich and complex content, and this article is merely an initial exploration of this vast topic. As a beginner, mistakes in my article are inevitable, and I sincerely welcome readers to offer valuable feedback and corrections.