Sharing Dorm WiFi: Bypassing Campus Network Restrictions
Preface
Dormitory broadband generally requires account login, which makes it impossible to directly use a router to share WiFi. This article will introduce how to configure a router (using Padavan firmware as an example) to bypass the campus network’s “one account per person” restriction.
Note: This tutorial is tested based on China Mobile broadband (Pingfeng Campus). For other carriers, please refer to the general approach and configure it yourself.
Screenshots
Preparation
- Router (recommended flashable models such as Newifi 3, K2P, etc.)
- Breed bootloader
- Padavan firmware
- School broadband account and password
- Ethernet cable
Cost estimate: About ¥150
Purchase advice: You can purchase them on platforms such as Taobao.
- If you are good at hands-on work, you can buy a brand-new unopened device and flash it yourself.
- If you are not familiar with flashing firmware, please buy a device that already has Breed bootloader and Padavan firmware flashed; it is usually more hassle-free.
Tip: This article does not include a firmware flashing tutorial. Please search for relevant materials yourself.
Initial Configuration and Router Usage
Important: If, after normal use for a period of time, you suddenly find that you cannot connect to the Internet, your device may have been blacklisted. Solution: Enter the router admin panel → External Network (WAN) → scroll down to MAC Address → click the
+icon to change your MAC address.
1. Unbind the Device (Important)
First, connect to the school’s official WiFi Wlan-edu. After connecting, ignore the authentication window that pops up.
Enter 192.168.210.100 in the browser address bar to access the User Self-Service System.
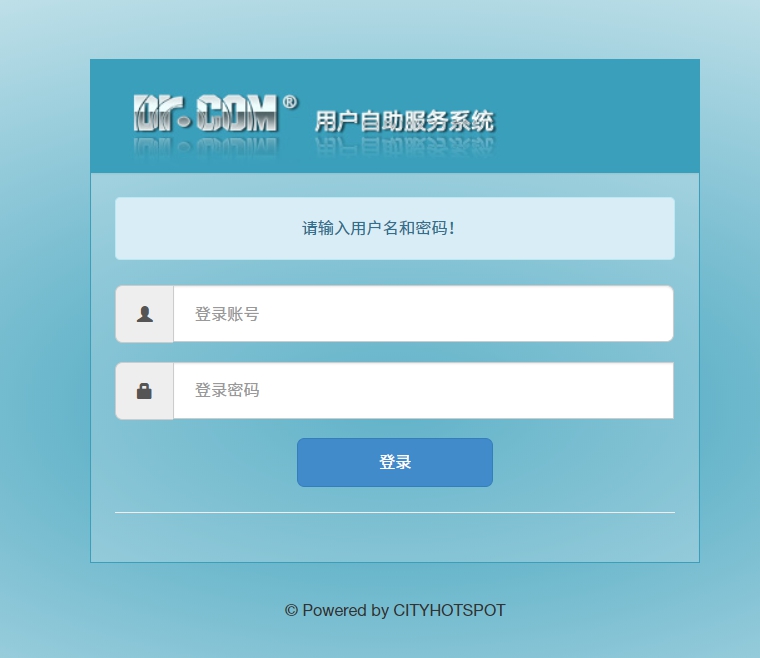
账号:学号
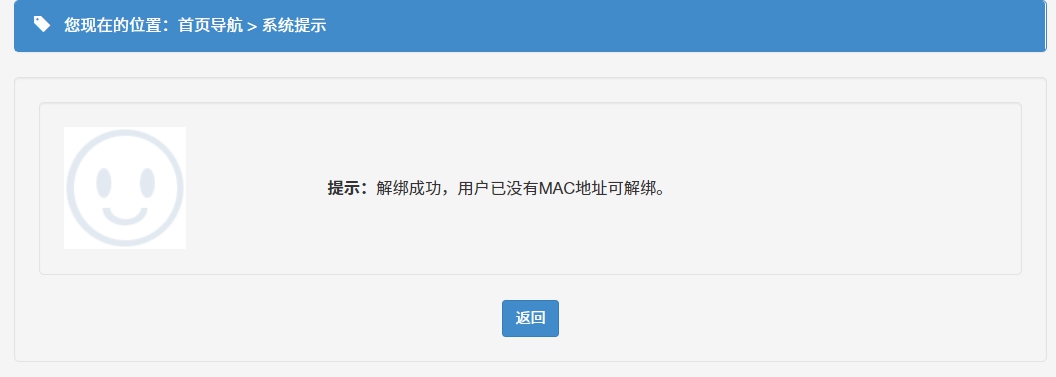
密码:身份证后八位 (或你修改后的密码)After logging in, find and click Unbind All MAC Addresses. After completing this, disconnect from the Wlan-edu WiFi.
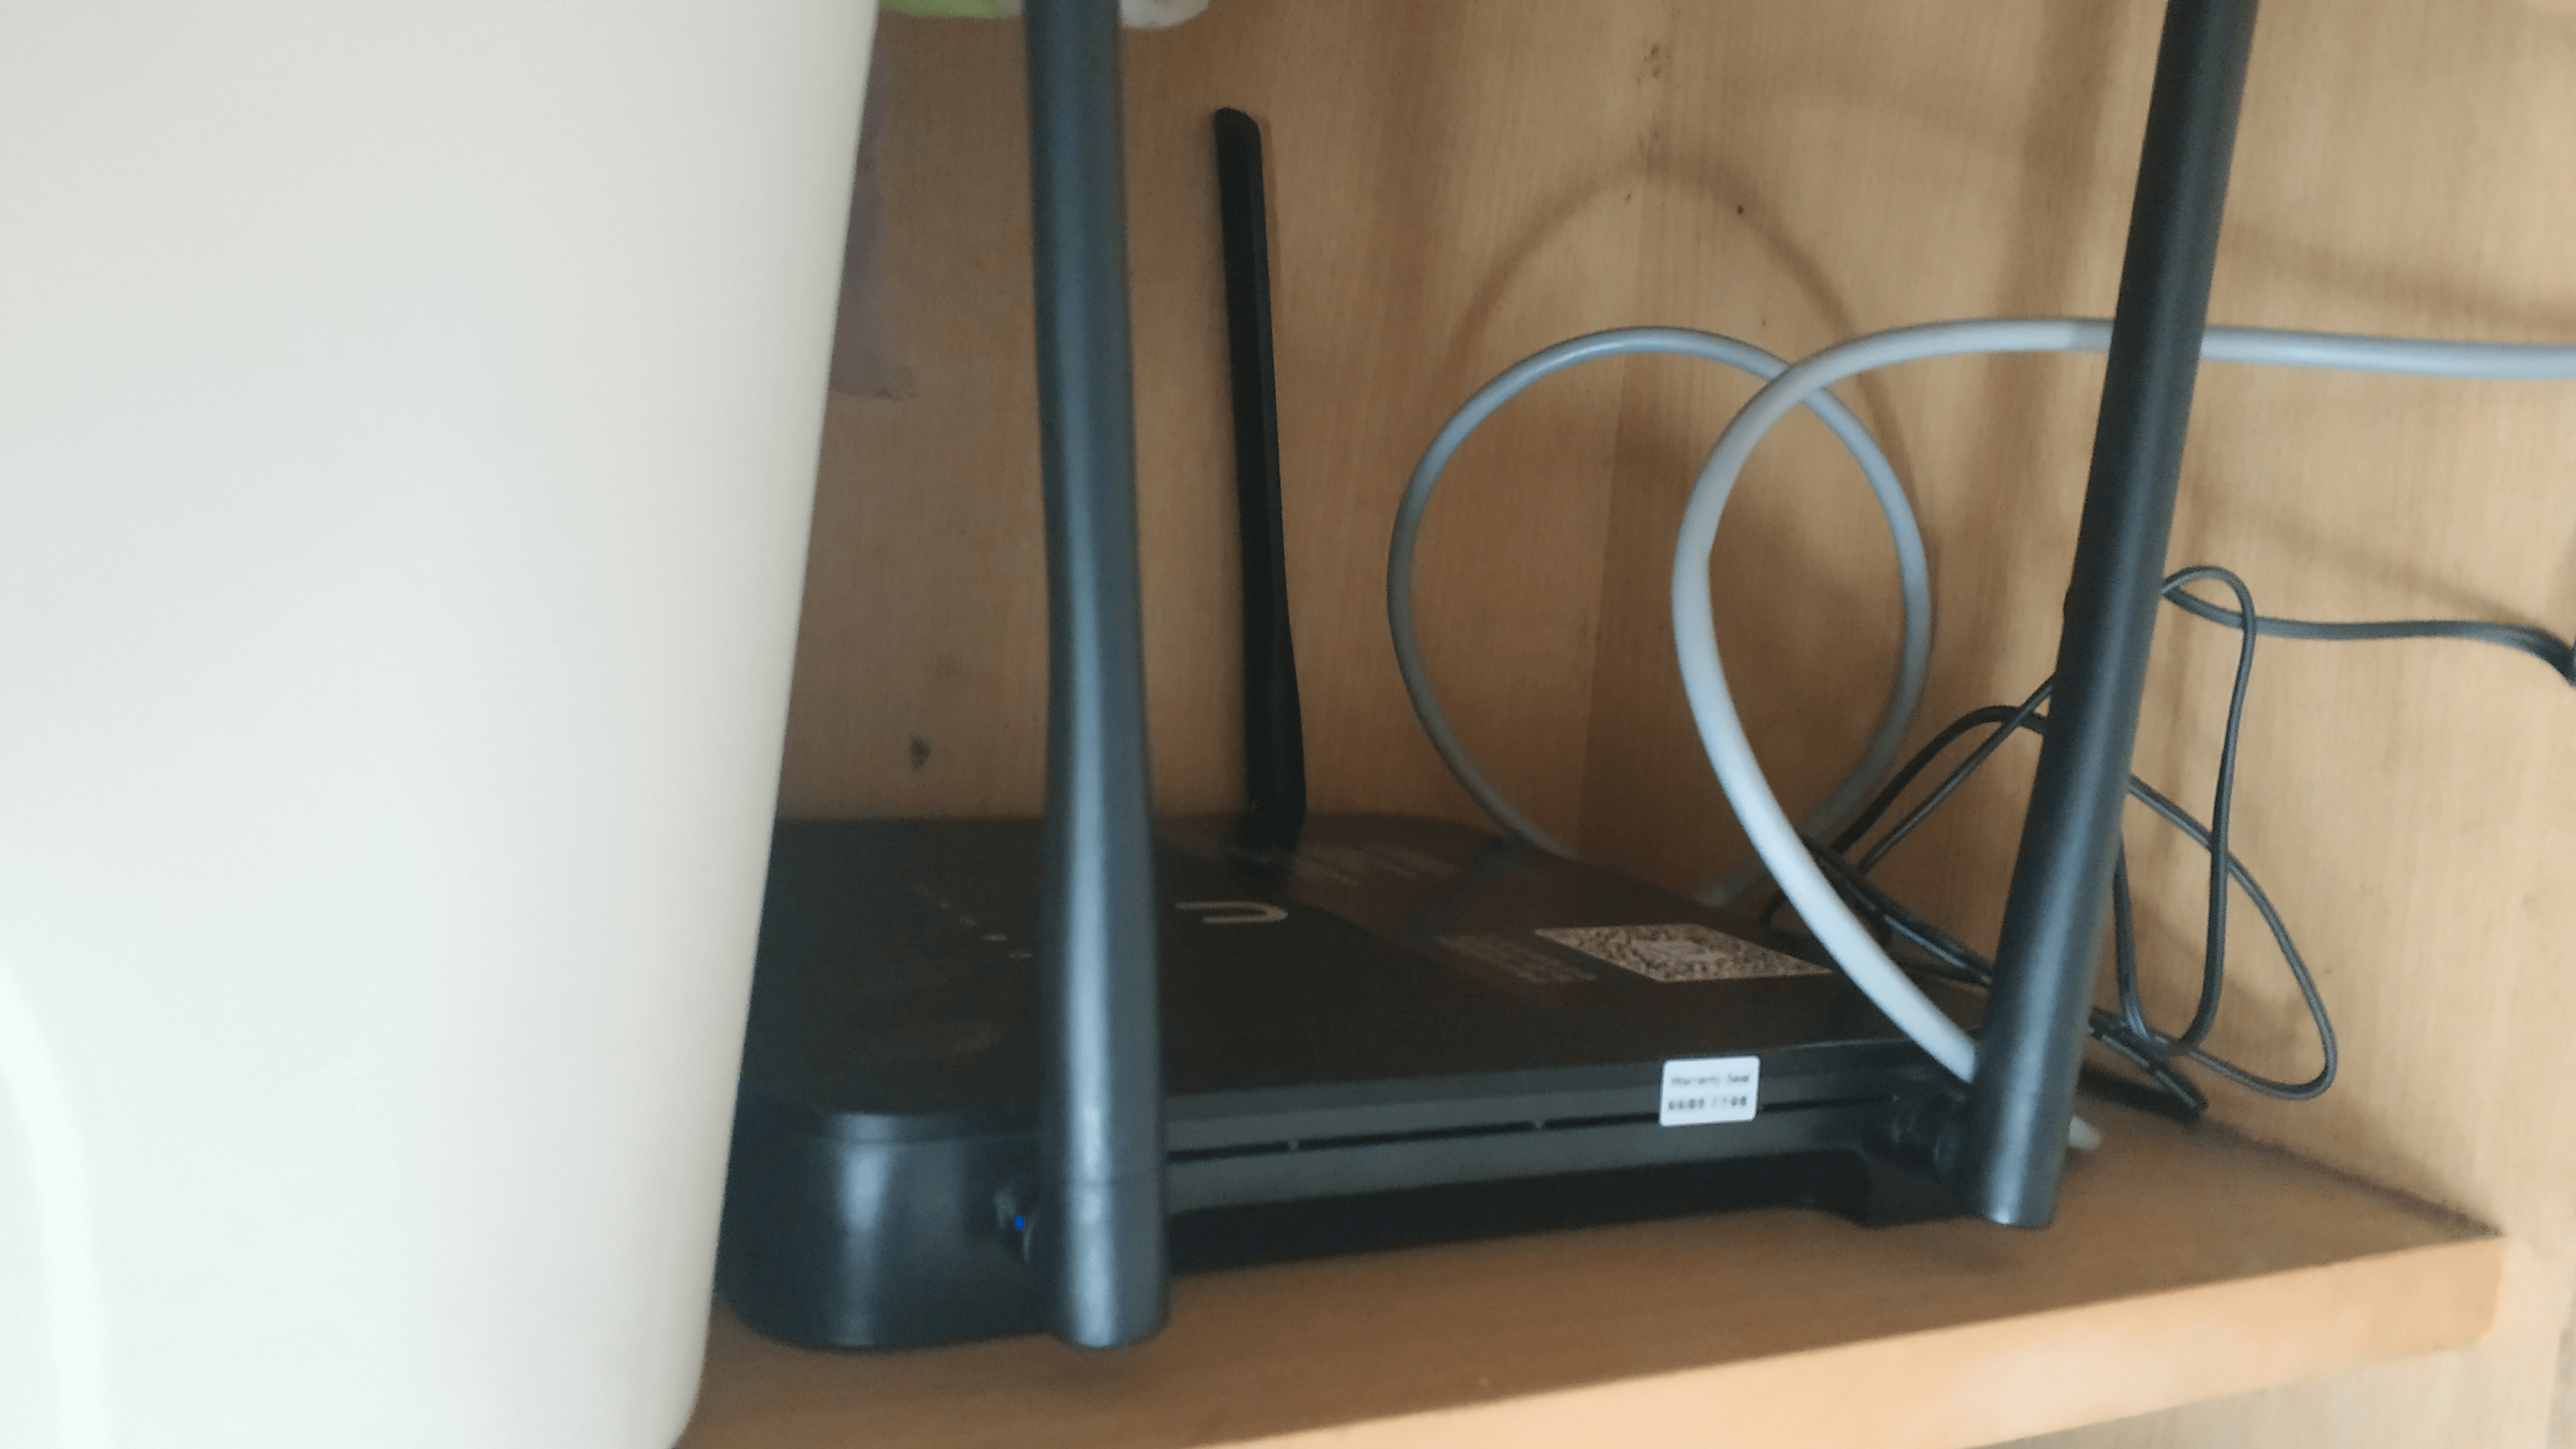
2. Connect the Router
- Power on the router.
- Use an Ethernet cable to connect the network port on the wall (usually the protruding port dedicated to China Mobile broadband) to the router’s WAN port (usually the blue port).
- After the router starts up, connect to its WiFi (the default SSID is usually
PDCNorPDCN 5G).
默认Wifi名称:PDCN 或 PDCN 5G
默认密码:1234567890
Configuration Method
1. Log in to the Firmware Admin Panel
After connecting to the router WiFi, open a browser and enter 192.168.123.1 in the address bar (the default admin address of Padavan firmware).
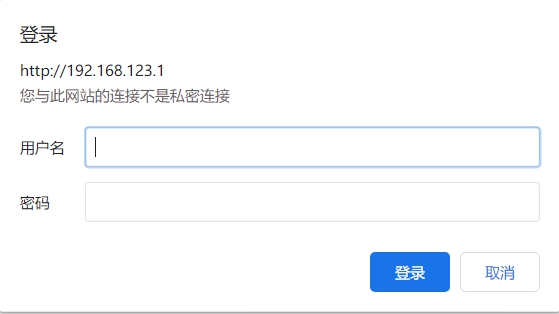
Enter the default account and password:
账号:admin
密码:admin
If you cannot log in
- Please try switching browsers (Chrome is recommended).
- Please check whether you have correctly connected to the router WiFi.
2. VPN Configuration
After logging in to the admin panel, find and click External Network (WAN) in the left menu.
On the External Network (WAN) settings page, configure as follows:
- WAN Connection Type: Select
L2TP - VPN Server:
192.168.113.1(Pingfeng Campus; please look it up yourself for other campuses) - Username:
hzxhaXXXXXXX(Pingfeng Campus defaults tohzxha+ the last eight digits of your phone number) - Password:
XXXXXX(Pingfeng Campus defaults to the last six digits of your phone number)

To prevent detection by the carrier (not necessarily effective), you can configure the following:
- Find the Do not decrement TTL for routed packets option and change it to For all packets.
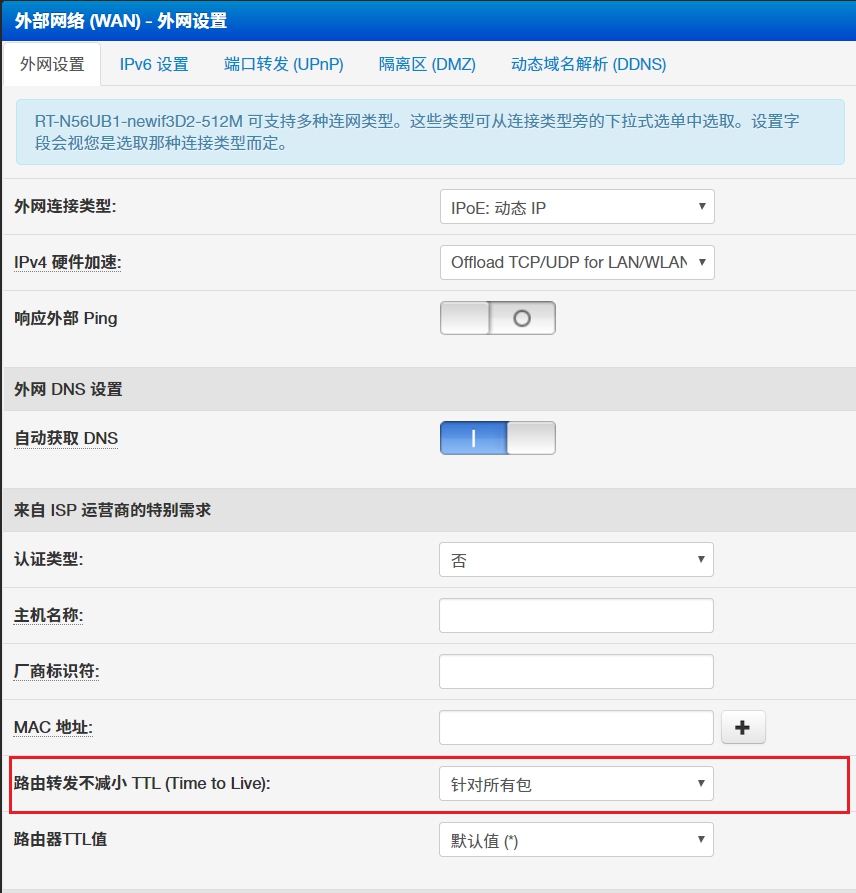
Click Apply settings on this page at the bottom of the page to save the configuration.
3. Log in to the Campus Network
After saving the settings, wait a moment. Open any webpage, and theoretically it will automatically redirect to the campus network login page.
Tip: If it does not redirect automatically, manually enter
192.168.210.111in your browser.
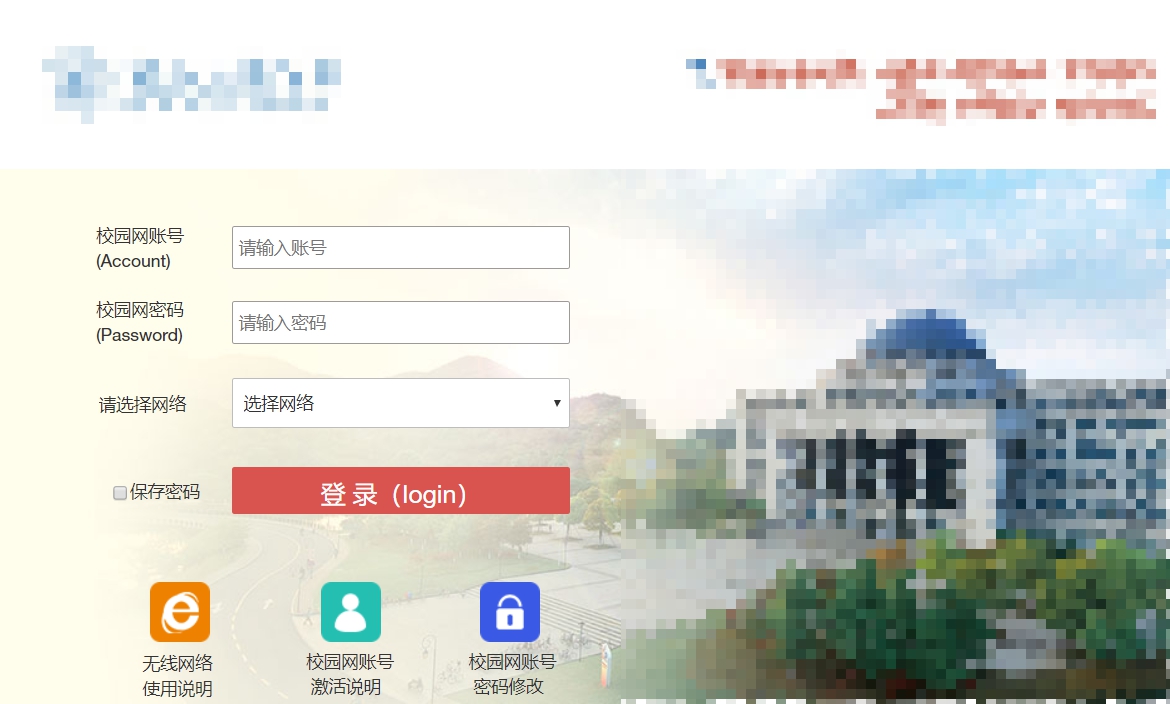
Enter your account and password:
账号:学号
密码:身份证后八位 (或你修改后的密码)
After logging in successfully, you can share the network through the router.
Information Summary
1. User Self-Service System (for unbinding)
- Address:
192.168.210.100 - Account: Student ID
- Password: Last eight digits of your ID card number
2. Campus Network Login Page (for Internet access)
- Address:
192.168.210.111 - Account: Student ID
- Password: Last eight digits of your ID card number
3. Router Admin Panel (for configuration)
- Address:
192.168.123.1 - Account: admin
- Password: admin
There may be errors in the article; corrections are welcome.